OAuth and OpenID Connect (OIDC)
OAuth 2.0 is an open standard for authorization. It is designed to allow a third-party application to obtain limited access to a web service, either on behalf of a resource owner (such as a user) or by allowing the third-party application to obtain access on its own behalf. OAuth 2.0 provides a way to delegate access without sharing credentials, using tokens instead.
OpenID Connect (OIDC) is an identity layer built on top of OAuth 2.0. It is used for authentication, allowing clients to verify the identity of the end-user based on the authentication performed by an authorization server, as well as to obtain basic profile information about the user.
OpenID Connect extends OAuth 2.0 by introducing:
- ID Token: A JSON Web Token (JWT) that contains claims about the authentication of an end-user by an authorization server.
- UserInfo Endpoint: An endpoint that returns claims about the authenticated user.
OpenID Connect provides a simple identity layer on top of OAuth 2.0, making it possible to authenticate users and obtain their profile information in a standardized way. It is widely used for single sign-on (SSO) scenarios, where users can log in to multiple applications using a single set of credentials.
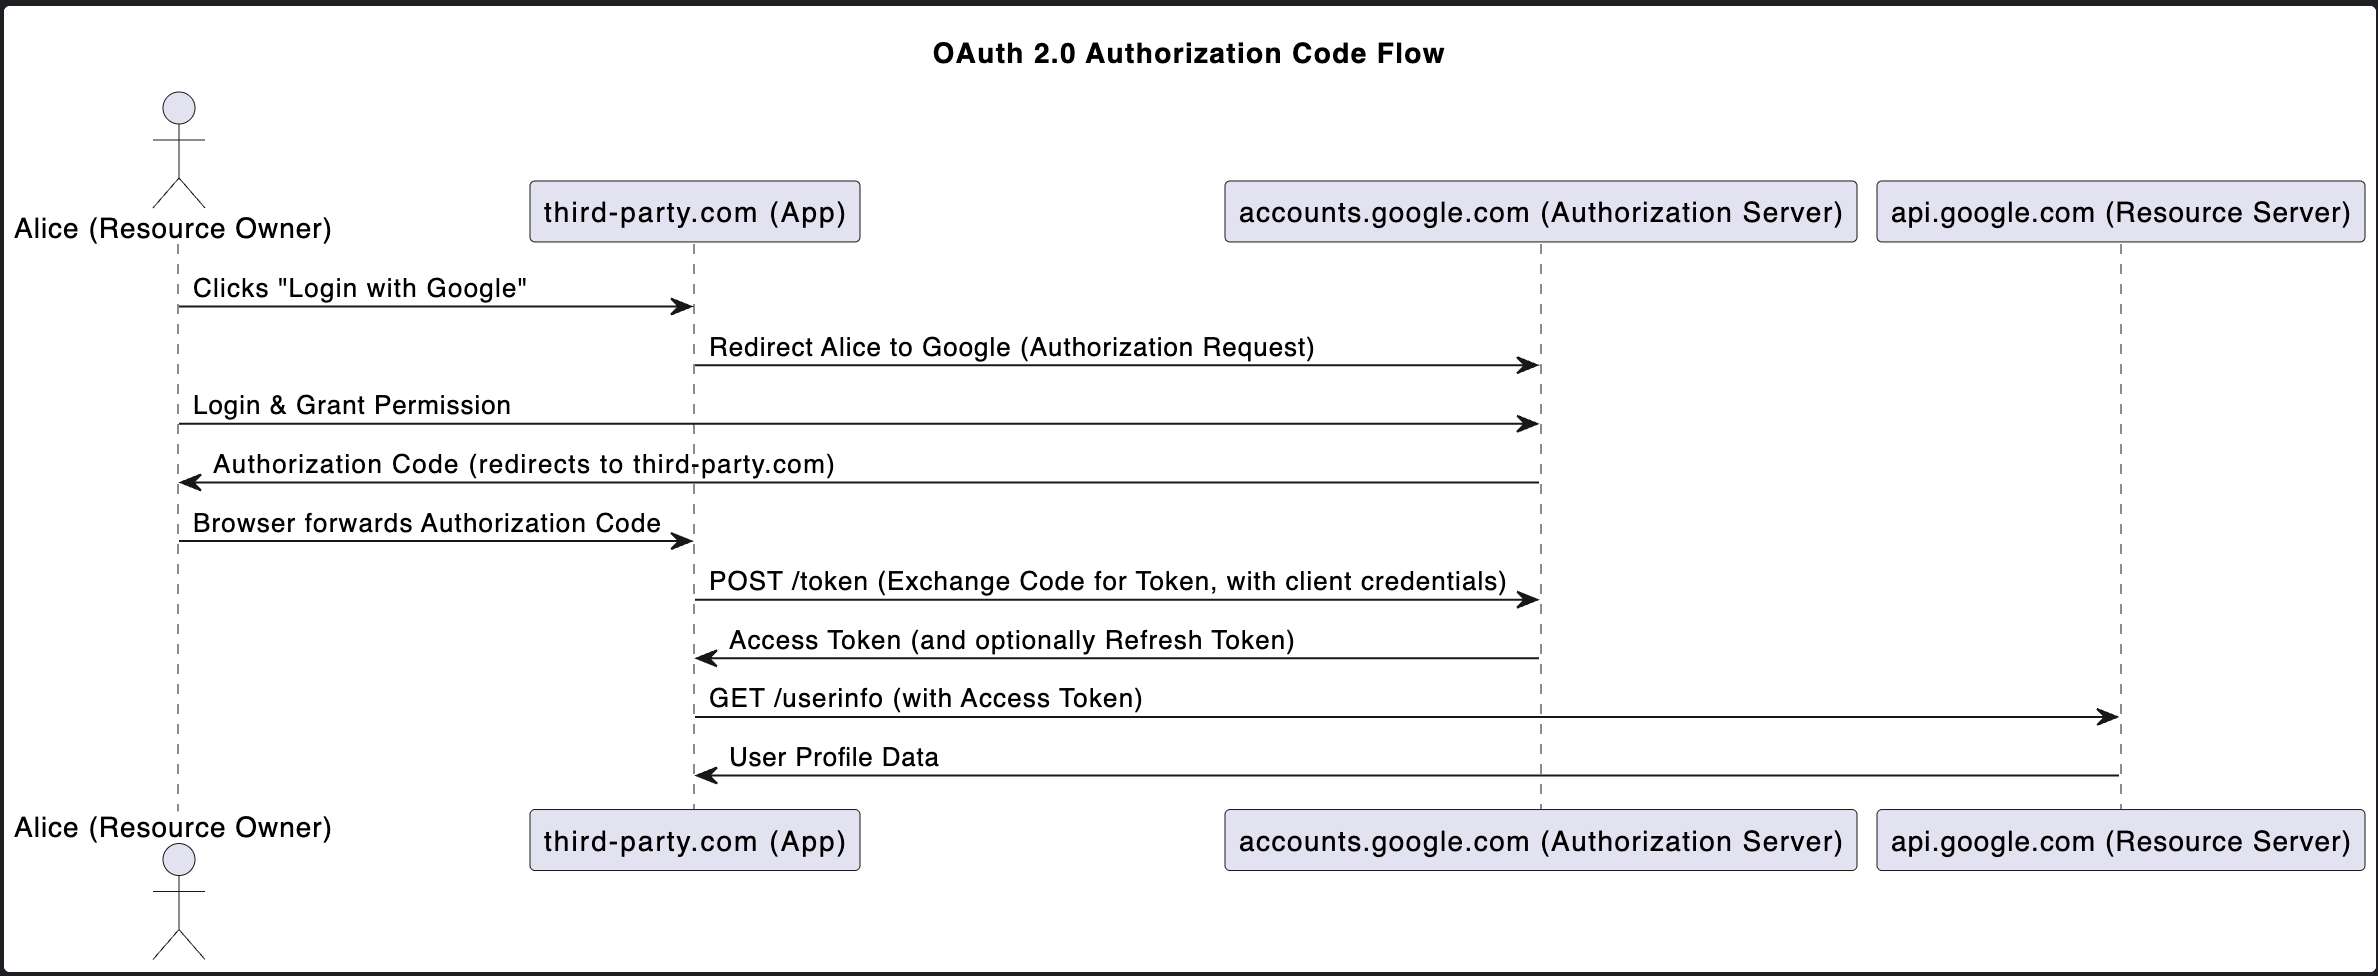
A simplify version of OAuth2 sequential diagram
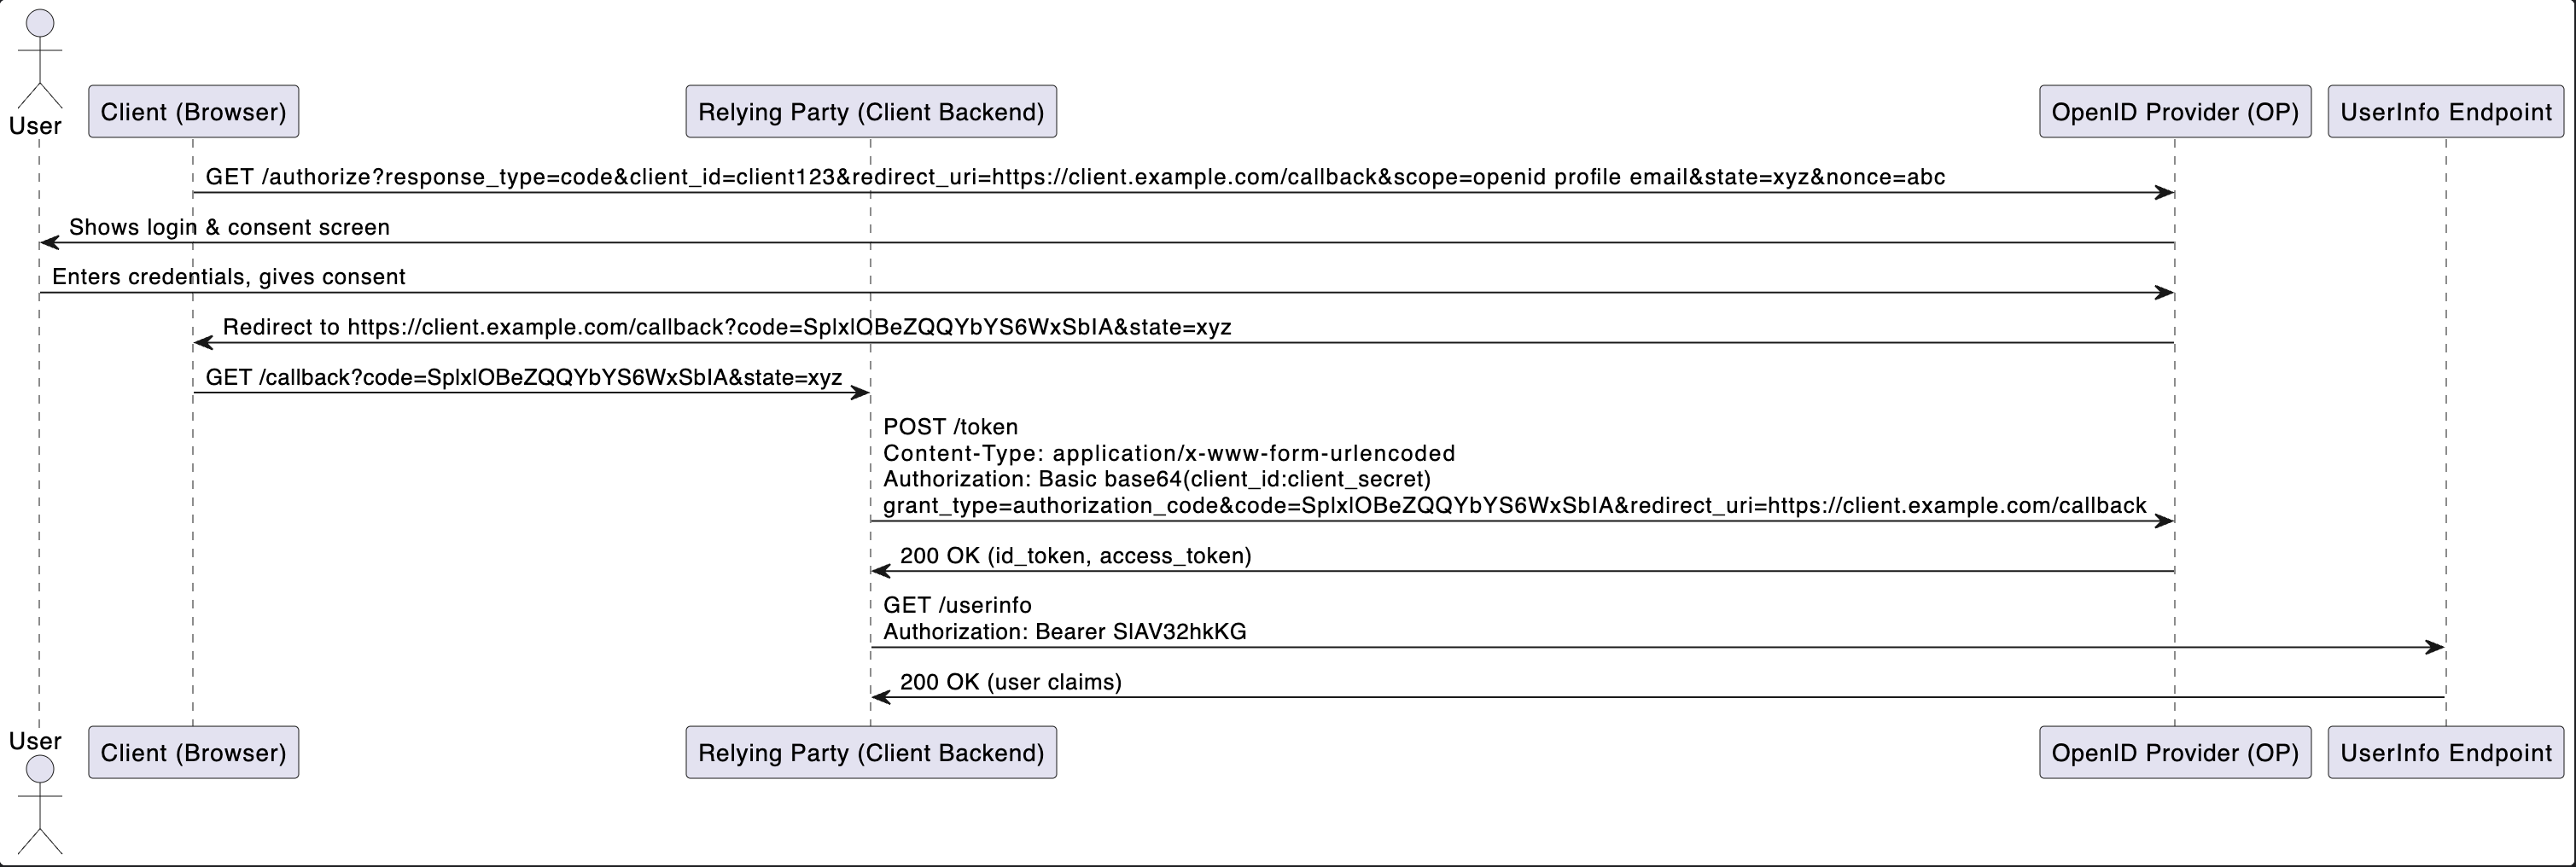
A simplify version of OpenID Connect (OIDC) sequential diagram
The example request
1. Client Redirects User to OP for Authentication & Consent
Browser is redirected to:
GET https://op.example.com/authorize?
    response_type=code
    &client_id=client123
    &redirect_uri=https://client.example.com/callback
    &scope=openid profile email
    &state=xyz
    &nonce=abc
2. User Authenticates and Consents
- OP shows login & consent screen.
- User enters credentials and consents.
- OP redirects browser back to client:
GET https://client.example.com/callback?code=SplxlOBeZQQYbYS6WxSbIA&state=xyzThe implementation of the /callback typically does the following:
- Verifies the state parameter matches what it sent (to prevent CSRF attacks).
- Extracts the authorization code from the query string.
- (Optionally) Checks for errors in the query string.
- Proceeds to exchange the code for tokens by making a server-to-server POST request to the OP’s /token endpoint (step 3).
This exchange is done securely on the backend, not in the browser.
3. Client Exchanges Code for Tokens
Client (server-side) sends:
POST https://op.example.com/token
Content-Type: application/x-www-form-urlencoded
Authorization: Basic base64(client_id:client_secret)

grant_type=authorization_code
&code=SplxlOBeZQQYbYS6WxSbIA
&redirect_uri=https://client.example.com/callback
OP responds:
{
  "access_token": "SlAV32hkKG",
  "id_token": "eyJhbGciOiJSUzI1NiIsInR5cCI6IkpXVCJ9...",
  "token_type": "Bearer",
  "expires_in": 3600
}- The Authorization header (with client credentials) is required by the OAuth2/OIDC spec for confidential clients to authenticate themselves to the OP.
- The /token endpoint is meant to be called server-to-server, not from the browser. Sending client credentials (client_id and client_secret) to the browser is insecure—they must remain secret.
4. Client Fetches User Info
Client sends:
GET https://op.example.com/userinfo
Authorization: Bearer SlAV32hkKG
OP responds:
{
  "sub": "248289761001",
  "name": "Jane Doe",
  "email": "janedoe@example.com"
}
After a successful token exchange, it's up the the server decide what to do next. For example, the backend can set a sessison cookie for the user, responds to the browser with an HTTP 200 and an HTML page, such as a dashboard or a “Login successful” page, or reidrect to the home page.